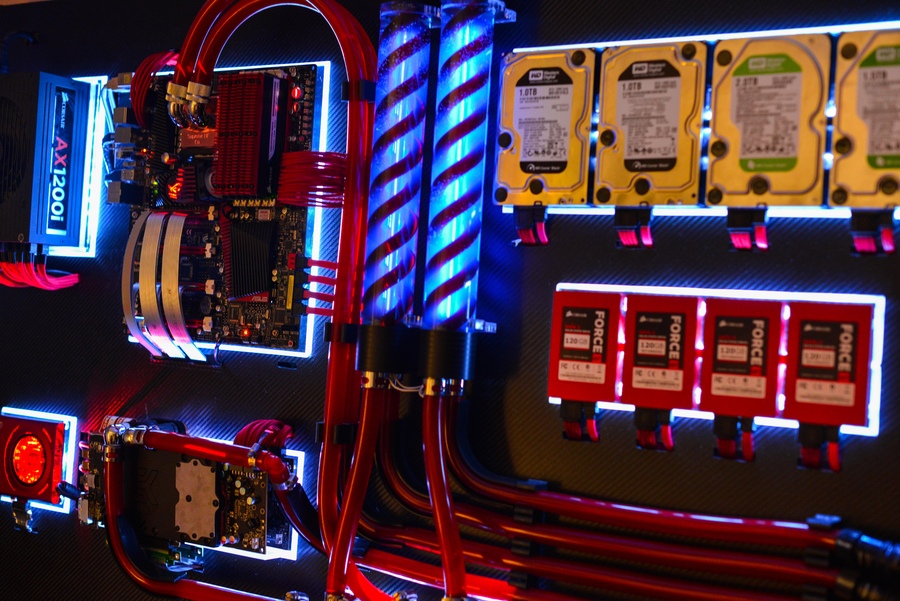
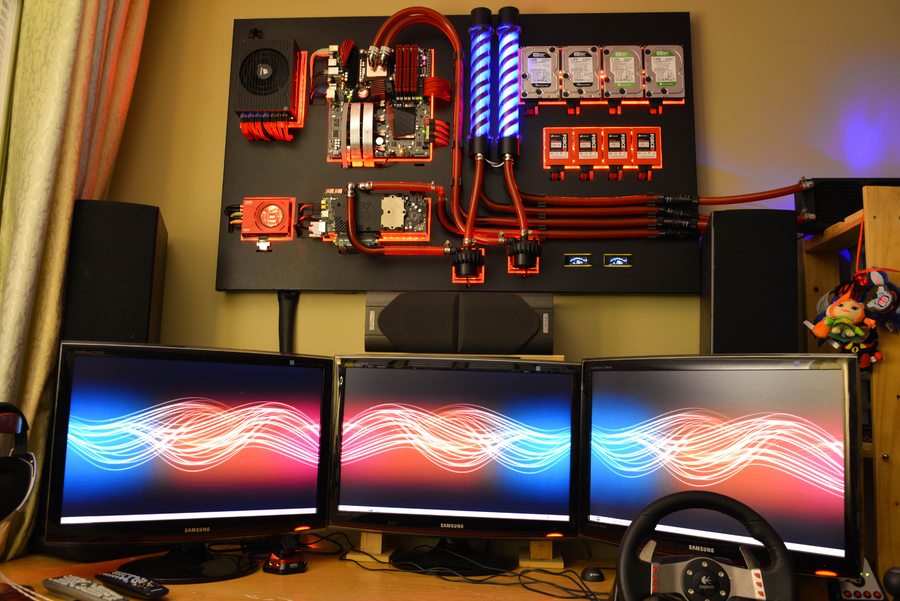
This is the ultimate wall mount water cooled rig, which took about 4 weeks and 100+ hours of work to put together. This is custom made wall mounted computer, and this whole project was done by Show4Pro (user in overclock.net).
The entire rig has 2 fans only on the board and pumps run at lowest power setting. And it is pretty much silent.
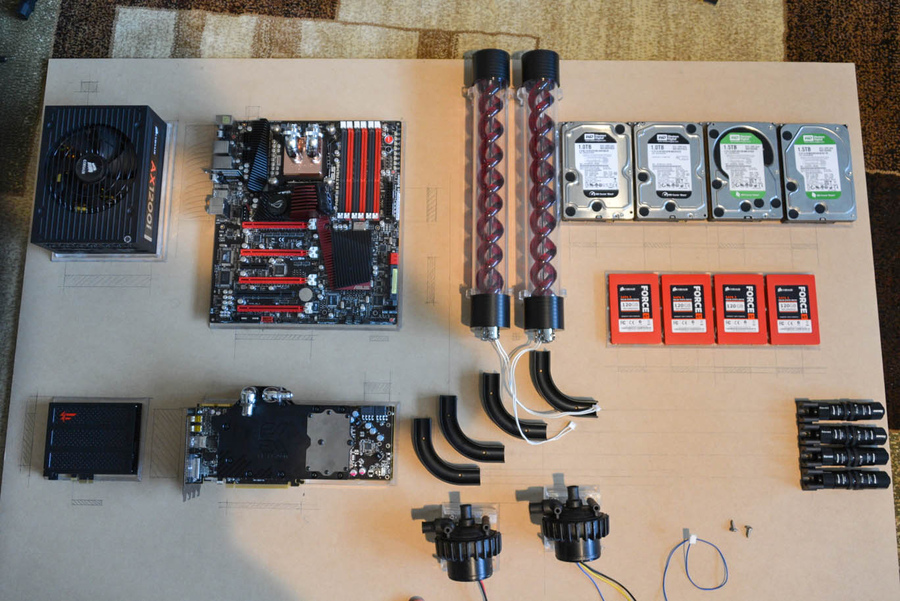
Here is a list of components used to build this wall mounted computer rig.
Main Components
- Intel Core i7-950
- ASUS Rampage III
- AMD Radeon HD 7970 x 2
- 2GB Corsair Dominator
x 6 - 120GB Corsair Force GT SSD
x 4 - 1TB WD Caviar Black
x 2 - 2TB WD Caviar Green
- 1.5TB WD Caviar Green
- Corsair AX1200i
- Creative Sound Blaster Zx
Cooling Components
CPU Loop
- EK Supreme HF Full Copper
- Swiftech MCP655 /w Speed Control
- FrozenQ Liquid Fusion V Series 400 ml Reservoir – Blood Red
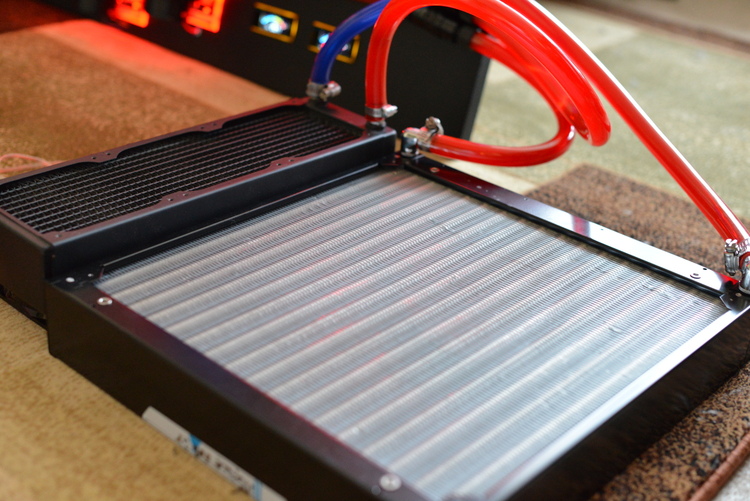
- XSPC RX360 Performance Triple 120mm Radiator
GPU Loop
- EK FC7970 – Acetal+EN
- Swiftech MCP655 /w Speed Control
- FrozenQ Liquid Fusion V Series 400 ml Reservoir – Blood Red
- Watercool MO-RA3 9×120 LT Radiator
Fittings / Misc.
- Koolance QD4 Quick Discounnect No-Spill Coupling
- Bitspower G1/4 Silver Triple Rotary 90deg Compression Fittings
- Monsoon Free Center Compression Fittings
- Phobya Angled Clip 90° Tubing Guide
- Phobya Terminal Strip Tubing Clip/Holder
- PrimoChill Advanced LRT Tubing Bloodshed Red
- EK UV Blue Non-Conductive Fluid
Cables
Build Log – Just summary
Here is a picture that shows you how all the components are accurately sized them according to their physical dimensions in PhotoShop.
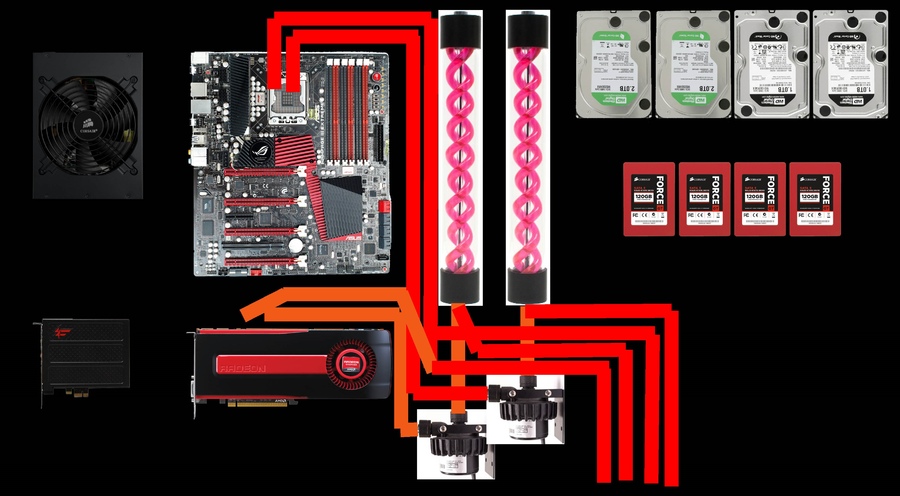
Draw the motherboard template onto the acrylic sheet and mount it. All the acrylic panels are cut at 45° angle to get the edge lit effect. Make sure all holes are drilled and tapped. Standoffs installed. The Rampage III Extreme is an eATX board. This is a standard ATX formfactor. An eATX mounting plate was later made.
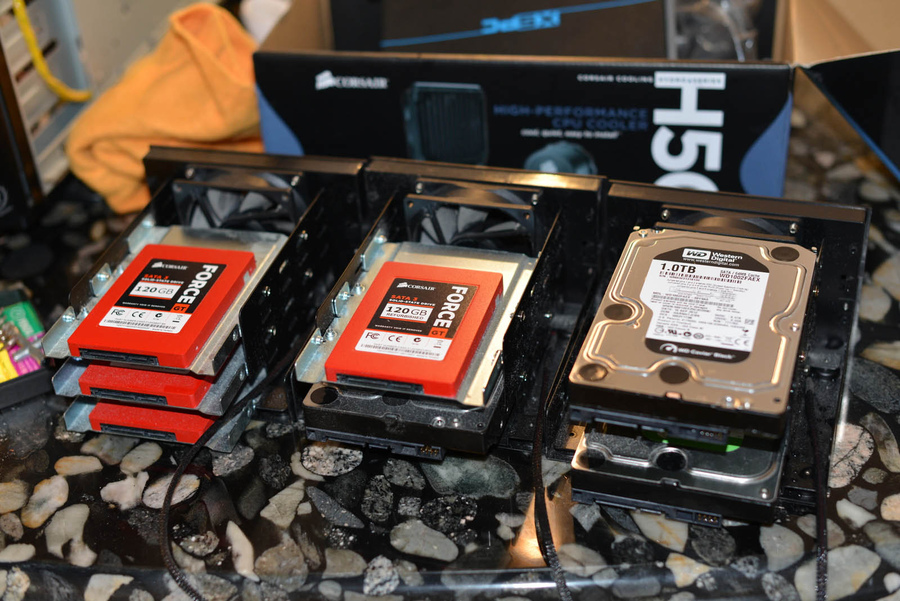
The drives are installed in Vantec HDCS caddies that converts 2 5.25″ bays into 3 HDD mounts.
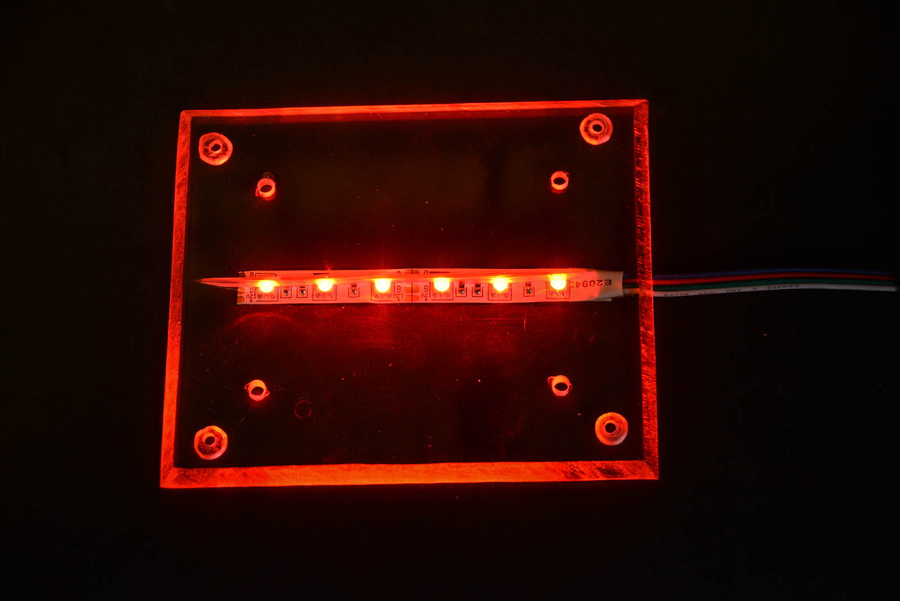
A triangular cut was made at the center of each plate. This will reflect the light which is projected perpendicular to the plate onto the edges of the plate. Without the cut the edges barely glow at all. All the back plates are wet sanded with 120 grit paper. All the acrylic back plates with the mounting holes drilled.
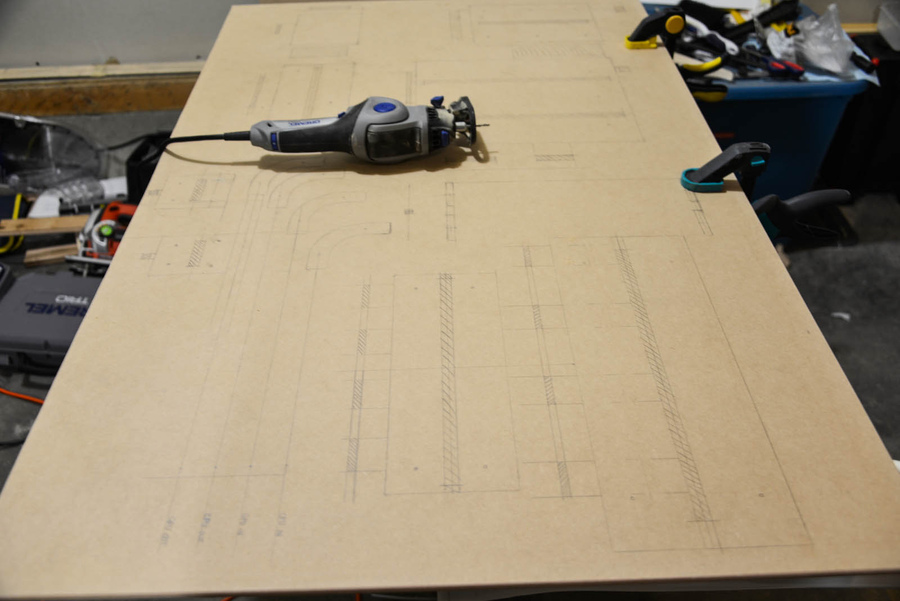
Laying out all the components on the board to mark various slot and hole locations. The board is a 1/4″ 48 x 30 hardboard.
All the slots and hole locations marked has been removed with dremel. Glue is been on the frame. LED strips are soldered and taped down.
Next the vinyl sticker applied on the board. Use aluminum tape on the top of the HDD and SSD backplates to hide the LEDs for where there are gaps in between the hard drives.
All the backplates are mounted to the board using #10 screws into tapped holes in the acrylic.
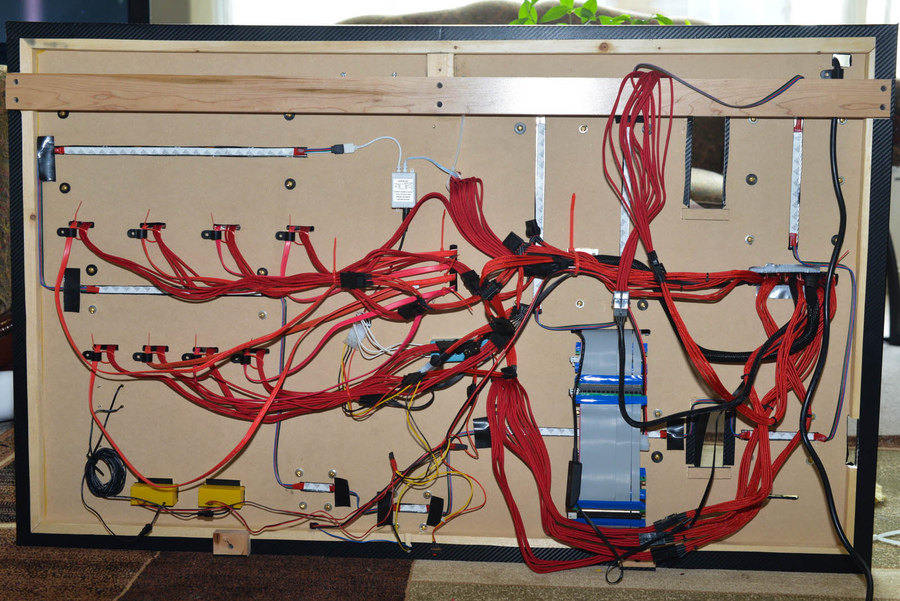
Now connect all the components using Bitfenix and Corsair cables at the back of the computer(including power).
3M risers and SoundBlaster Zx installed.
Leak testing the system while its on the ground and easy to trouble shoot.
Finally it’s done. The incredible wall mount computer rig just for gamers. For more information, video and tutorial about this article please visit the source link.
1 comment
Comments are closed.
Add Comment