In our previous tutorial we have created an article on how to run DOS programs in Windows 10. Today we are going to see on how to remove Cortana from Windows 10.
Note: Make sure you take a full backup to restore Cortana back when you need it.
How to:
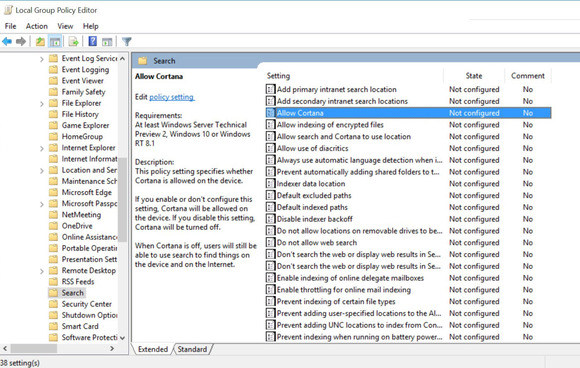
Press Win+R and type gpedit.msc in the search box. Now a folder will open ‘Local Group Policy Editor‘ to the right side navigate to Local Computer Policy > Computer Configuration > Administrative Templates > Windows Components > Search.
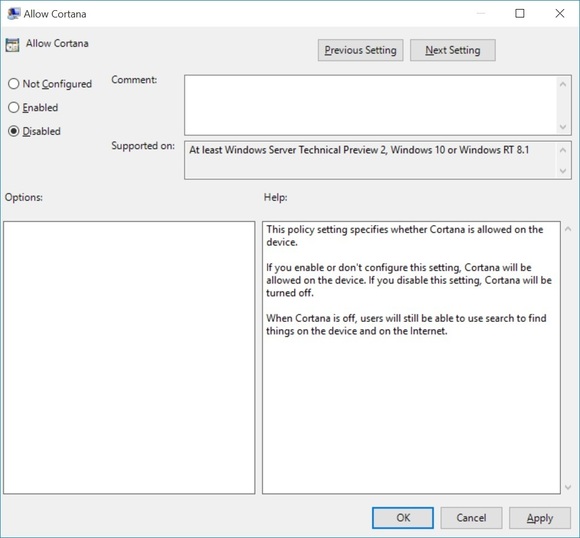
Double-click the policy name ‘Allow Cortana‘ and you will see policy window appears just click ‘Disabled‘ and ‘OK‘.
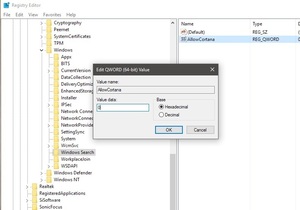
Now press Win+R and type Regedit into the search box. Navigate to HKEY_LOCAL_MACHINE\SOFTWARE\Policies\Microsoft\Windows\Windows Search. Now right-click the Windows directory and select New > Key and name it Windows Search.
Click on Windows Search, right-click and select new DWORD and name it AllowCortana. Then right-click that value and make sure it’s set to 0.
You’re done now. Make sure you just Sign out and sign in back to make this work.
Source: pcworld.com