

JIS is a beginner level B2R challenge. If you are a beginner and want to strengthen your penetration testing skills, do try this challenge. The VM is available at https://www.vulnhub.com/entry/jis-ctf-vulnupload,228/ . This machine is only compatible with Virtual box.
We’ll be using Parrot Security OS and Virtualbox in the walkthrough but you can use any Linux Distro you want.
So fire up your Linux and import the VM to Virtualbox and then start the machine.
Use the following command to discover the IP address of your machine
sudo netdiscover -i wlan0 -r 192.168.0.1/24
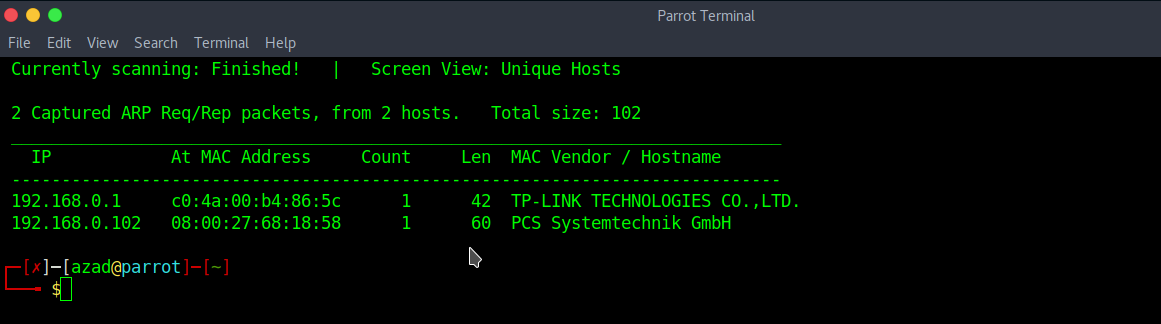
Our machines IP Address in my example is 192.168.0.102 along with Virtualbox’s MAC Address. Next, run a full port Nmap scan to discover open ports.
nmap -p- 192.168.0.102
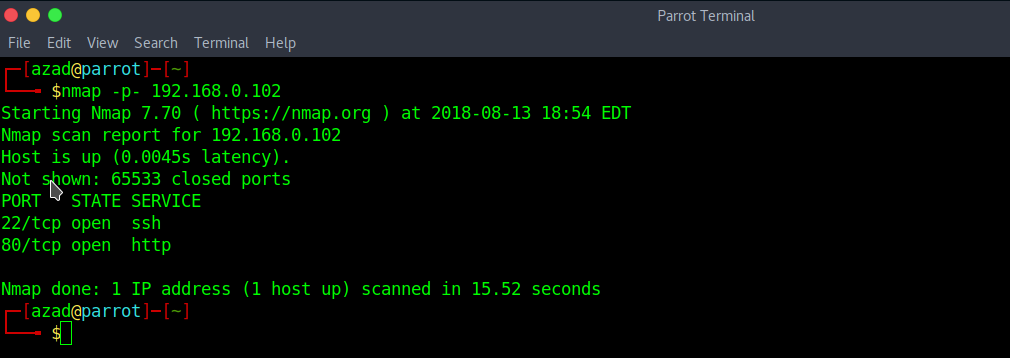
The SSH and HTTP port is open, it looks like we can discover more on HTTP. Enter the IP address in your Web Browser. A login page is found here
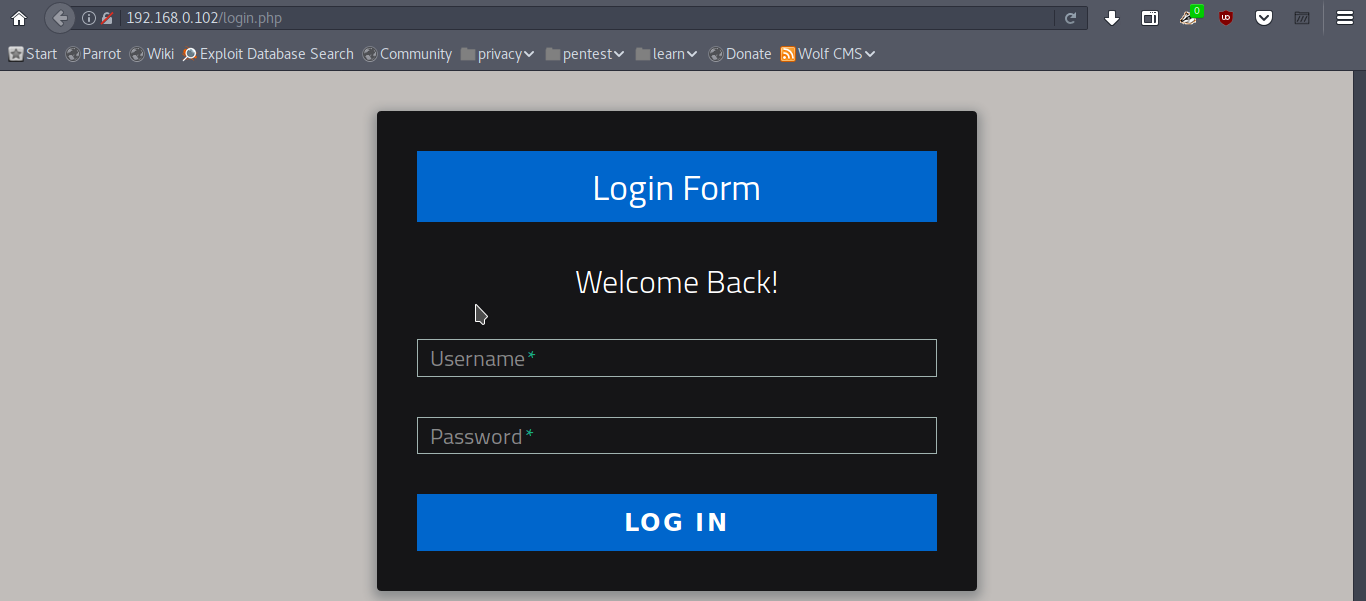
Entering common credentials won’t help here. So check robots.txt file. It has following disallowed entries.
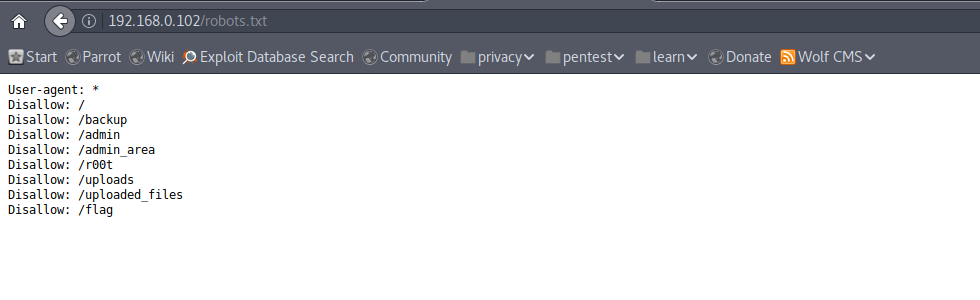
We found our first flag in /flag file
The 1st flag is : {8734509128730458630012095}
All other disallowed entries don’t exist except “/admin_area” and “/uploaded_files”. Checking “/admin_area”

Nothing here, but when we press CRTL+U and view the page source code, we get our second flag plus some credentials.

When we enter these credentials into the Login Page, we are redirected to an Upload Center. Seems like we got a file upload vulnerability here.

I’ll be trying a PHP reverse shell from Pentest Monkey http://pentestmonkey.net/tools/web-shells/php-reverse-shell . Just download the reverse shell and enter your own IP address and port number and then Upload it.
Open a Netcat listener
nc -nlvp 1234
Then access the uploaded file from /uploaded_file/php-reverse-shell.php. Hooray !! we got a shell here.

Now, the only thing left is to get root. After some further “post-exploitation”, we got our third flag plus a hint in directory “/var/www/html/” indicating that the credentials of a user “technawi” are stored in a file.

After a little bit of research and using the following command,
find / -user technawi -type f 2>&1 | grep -v "Permission" | grep -v "No such"
You’ll see the following output,

We successfully got our 4th flag and some credentials. We’ll try these credentials on SSH and then read the ”/var/www/html/flag.txt”.

And there we got all the flags