
Whether you have a desktop PC or a server, Microsoft’s free Diskspd utility will stress test and benchmark your hard drives. It helps us find which of our hard drives is the fastest, and is it really as fast as the manufacturer promised.
Downloading The Diskspd
Microsoft offers this excellent tool for free, and you can download it from Microsoft Technet. It’s even open source, so you can download and inspect or modify the source code from GitHub.
After downloading it, extract the contents of the .zip file to a folder on your computer. Note that the archive contains three different “diskspd.exe” files.
- The one in the “amd64fre” folder is for 64-bit Windows PCs
- The one in the “x86fre0” folder is for 32-bit Windows PCs.
Diskspd has been tested to work on desktop versions of Windows 7, 8, 8.1, 10, as well as Windows Server 2012, 2012 R2, and 2016 Technical Preview 5.
Why Diskspd Is The Best Choice?
- Diskspd makes an excellent tool to know the IO ability of your drives.
- Diskspd will tell you the maximum capacity a server’s hard drives can handle, or point you at the fastest hard drive you should use for heavy workloads (or just demanding PC gaming) on a desktop PC.
Example : Assume that we have three drives on a server, an F drive, G drive and C drive. If we have our MDF on the F drive, the LDF on the G drive and our OS on our C drive, we can evaluate whether our setup is effective. So if the MDF file is the busiest file with the most reads and writes then we would want it to be on the fastest drive.
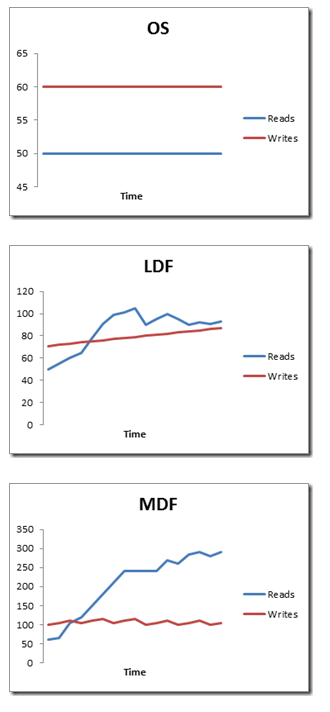
So from the above example with the graphs (representing the writes and reads for the OS, LDF and MDF), we would place our MDF file on the fastest drive since our MDF is the busiest. If our Diskspd analysis showed that F was our fastest drive then MDF should be placed on drive F.
Performing The Stress Test
To perform a single test : Simply invoke a Diskspd command from an Administrator-enabled Command Prompt.
- On Windows 10 or 8.1 – Right-click the Start button and select Command Prompt (Admin).
- On Windows 7 – Go to start andtype cmd , right click on cmd and choose Run as administrator
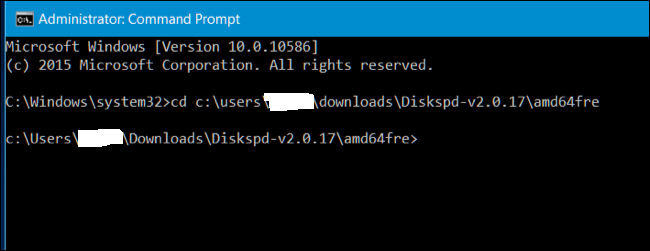
Now use cd to switch to the directory containing the Diskspd.exe you want to use:
cd c:\path\to\diskspd\amd64fre
Now you can run the Diskspd command with the options you want to use. You will find a complete list of command line options and usage information in the 30-page DiskSpd_Documentation.pdf file included in the Diskspd archive you downloaded.
An Example Command
The following command sets the block size to 16K (-b16K), runs a 30 second test (-d90), disables hardware and software cashing (-Sh), measures latency statistics (-L), uses two IO requests per thread (-o2) and four threads (-t4) per target, uses random access rather than sequential writing (-r), performs 30% write operations and 70% read operations (-w30).
It creates a file at c:\testfile.dat of 50 MB in size (-c50M). If you wanted to benchmark your D: drive instead then specifiy it as d:\testfile.dat
Diskspd.exe -b16K -d90 -Sh -L -o2 -t4 -r -w30 -c50M c:\testfile.dat
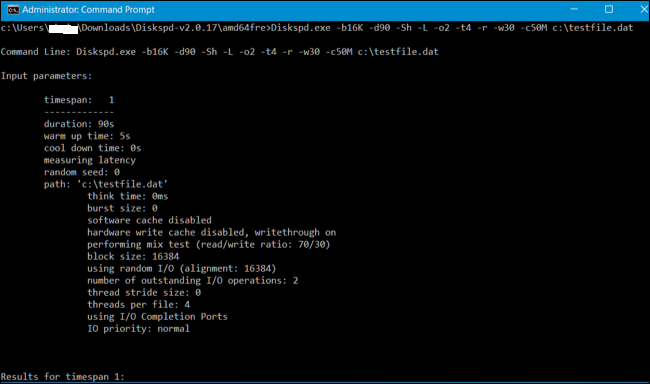
After however long you specify the result will display after that time. In the above test–the test results will be printed to the Command Prompt after 90 seconds as specified (-d90) and you can view them.
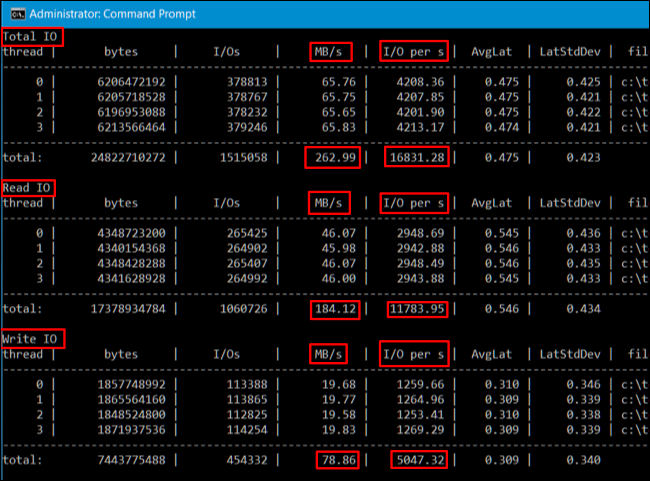
Consult the results and you will see the average MB/s the drive reached during the test–how many write operations were performed a second, how many read operations were performed a second, and the total amount of input/output (IO) operations per second.
These statistics are most useful when comparing multiple drives to see which is faster for certain operations, but they will also tell you exactly how much IO a hard drive can handle.
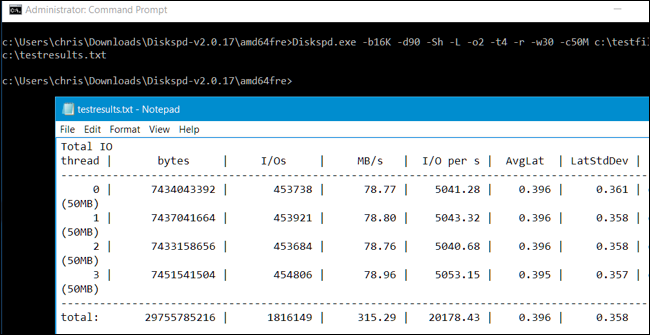
With the > operator you can save the result to a text file and view it later. The below command runs the same command as above and places the results in the C:\testresults.txt file.
Diskspd.exe -b16K -d90 -Sh -L -o2 -t4 -r -w30 -c50M c:\testfile.dat > c:\testresults.txt
Now repeat the same procedure for other drives to compare the results and come to a conclusion on which drive has the best performance.
Source : How-to-geek